Leads email integration is a powerful feature that allows you to integrate leads from your email address. You can set up an email forwarder from any form you are using and you will get the leads into the CRM.
Eq. You are using 4 forms on different websites, you set in your cPanel forwarders when you receive an email from any of these forms to forward to the lead’s email which you have set up in Setup -> Leads -> Email Integration
This feature is very sensitive so make sure you read the explanation carefully.
Navigate to Setup-> Leads -> Email Integration.
By default, this feature will be inactive. When you configure the email integration you can set it to active so the cron can process emails if any are found.
- IMAP Server – Your leads email IMAP Server.
- Email address (Login)
- Password
- Encryption (SSL/TLS/No Encryption)
- Delete the email after import – If you check this option the mail will be deleted after a successful import.
- Auto mark as public – Auto mark this lead as public, public leads are visible to all staff members.
- Folder – Default is INBOX – If you are using Gmail you cant change to ex. Social, forums, update leave it to INBOX
- Check Every (minutes) – The cron will check for new emails every X minutes you set up here. It recommended this field be bigger than 10 minutes. Don’t hard change in the database.
- Only check none opened emails – By default the cron will check only none opened emails. After checking the email will set this email as opened so the next time won’t be checked. This is used to prevent checking all the emails again and again in each cron run. For example, if you have 40000 emails there the CRON will be very slow and you won’t be satisfied with the results. In this case, if this field is checked everything will work fine.
- Default Source – After lead importing add source. Ex. Email Integration
- Default Status – The default status to be assigned after import
- Responsible for the new lead – auto assigns responsibility for this lead.
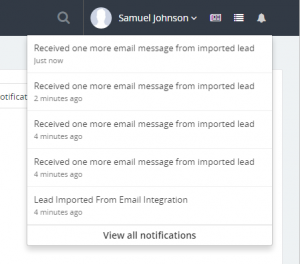
- Notify when lead imported – Do you want to be notified when a new lead is imported from the email integration
- Notify if the lead sends an email multiple times – This is used when a lead sends an email multiple times. Ex. the lead sends an email and is imported after that send another email but the lead already exists in the database so when viewing this lead on the right side you can view all emails from this lead sent. If this option is checked and the lead sends multiple emails you will be notified.
- Notification – Staff Members with a role or Specific Staff Members – If you don’t select any staff or roles no one will be notified no matter if the notification fields above is checked.
After you set up, all the fields SAVE the email configuration and test the connection clicking on the TEST IMAP CONNECTION button on the right side
Authentication failures
If your authentication is failing, there are several likely causes:
- You have the wrong username or password
- Your connection is being diverted to a different server (as above)
- You have specified authentication without encryption
Common issues with Gmail or G Suite – Invalid username or password
Invalid username or password when using Gmail or G-Suite can be a common error if you haven’t turned Less Secure Apps to ON, however, it’s recommended first to check if your password is correct.
G-Suite
- Sign in to the Google Admin console.
- Click Security > Basic settings.
- Under Less secure apps, select Go to settings for less secure apps.
- In the subwindow, select the Allow users to manage their access to less secure apps radio button.
- In case you are not receiving the emails and your SMTP configuration test email is showing that the configuration is working properly, take a look at the following articles:
Gmail Regular Account
- Log in to your user account.
- Visit: https://www.google.com/settings/security/lesssecureapps
- Toggle on.
2 Factor Authentication Enabled
If you are have enabled 2-factor authentication on your Google Account, you MUST generate an application password and add the password in the password field.
Click here to read how to generate App Password.
Notes
- After the lead is imported the email will be set to open.
- This feature does not auto-populate the leads fields, only the email and the name will be auto-populated. If the sender has set up NAME in the email client will be auto-populated in the lead name field otherwise the email will be taken as a name because the email clients add the email as a name if no name is specified.
- Set lead to junk if the imported lead is not accurate for you to prevent double importing. If you delete the lead and this lead sends an email again will be imported again. Better to set it to junk.
- If you have unchecked Only check none opened emails – all emails will be checked again and again meanwhile only will be checked non opened emails.
- If the email integration feature is set to active and the CRON cant connect to the IMAP server activity will be logged. To check the activity go to Utilities -> Activity Log and find [CRON] Failed to connect to IMAP lead email integration
- If the lead exists in the CRM after checking the email and this lead is with status junk the email won’t be saved into the database and no notifications will be received.
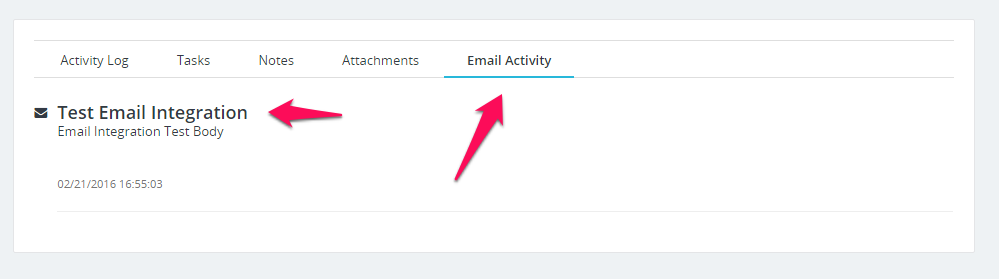
- If the lead is already manually added into CRM you will receive notification that this lead sends an email and the email subject and body will be logged into the lead profile.
- If any attachments found in the email will be auto imported for this lead.
Importing emails from existing email address
If you don’t want to use the brand new email address for this feature you have to configure the leads email integration in a different way.
- Uncheck the field Only check non opened emails
- Navigate to Setup->Email Templates and disable the email template (New Lead Assigned to Staff Member) to send a notification when a lead is assigned.
- If you have ex 1000 emails uncheck all notifications settings to prevent receiving 1000 notifications in the CRM.
- Let the cron run 1 time and check all the emails. After all leads from your email is imported revert back to the old settings mentioned above.